Manufacturing tolerances are important because they are used to indicate the allowable deviation in manufactured parts. Manufacturing tolerances will be different for each type of part, because every part is built with a different method and set of specifications. The purpose of a manufacturing tolerance is to allow for a slight amount of variance in the manufacturing process. A part tolerance is anything that shows how small or large a specific part can be manufactured. Factory inspectors use CNC Machining tolerances to inspect parts for consistency and quality assurance.
Tolerances are not used for equality, but rather for accuracy and quality inspection. They serve as an important tool during the manufacturing process, so each part is built with precision, accurately to size and exact specifications. Today’s manufacturing techniques allow tolerances to be introduced at any point in the production process; from machining, drilling and cutting through assembly, painting or finishing.
The following article provides an introduction to CNC Machining, Milling and Turning Tolerances.

CNC Machining Tolerance
The CNC machining tolerance is the amount of deviation that is allowed when a part is being manufactured based on a computer program for manufacturing. This tolerance is significantly smaller than what can be produced by hand or by using conventional technology like cutting boards and jigs. The benefit of this type of manufacturing process is that it is much faster and more accurate than anything else. It also minimizes errors because it only requires one cut instead of many steps to get the part dimension correct.
CNC machining tolerance is the amount of material that will be removed from a material’s surface to make it conform to the required dimension. CNC machining tolerance can be either external or internal, depending on how much material will be required to produce the required dimension. When trying to achieve a very low CNC machining tolerance, computer-controlled equipment will often move the robotic arm in fractions of microns; this is sometimes referred to as “sub-micron accuracy”. But because of manufacturing tolerances like tool wear and part variations, this type of accuracy may not always be possible. Therefore, a larger CNC machining tolerance is generally acceptable for prototypes and anything that has very large dimensions.
CNC Turning Tolerance
CNC Turning Tolerance is the smallest size of a machined metal part that can be successfully machined to a specify tolerance. Tolerance for CNC Turning is controlled by the “Class” of the part. Class 1 parts are the most precise parts, and can be made in many different materials. Class 3 parts are the least accurate and can be made from relatively soft metals
A CNC Turning Tolerance can be specified for any class of part.
The standard tolerance is ± 0.002 inch per every inch of finished diameter or 0.05% of diameter, whichever is greater. For example: a 7/8 inch diameter part with a ± 0.005 inch tolerance would have a total allowable deviation of ± 1/8th of an inch (0.125″) which meets both requirements because it is greater than either requirement individually (0.05% or 0.002″).
The dimension of the component must be greater than or equal to the sum of its part tolerance, as well as a safety factor, which is typically 0.5 or 0.7 and is set by the customer. For example, if the tolerance of a component is 0.002″ and a customer sets a safety factor of 0.7, then this component can be manufactured with a dimension up to 1 inch greater than the specified dimension (1 inch + 0.002″ = 1.002″).
CNC Milling Tolerance
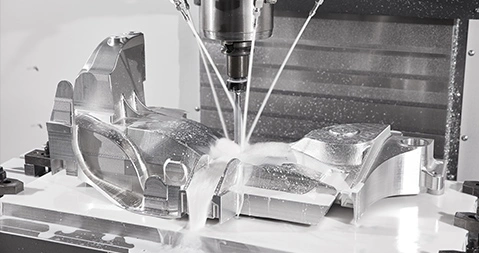
CNC milling tolerance is the amount of deviation in a dimension that is allowed when being machined on a lathe. There are two types of tolerance, internal and external. Internal means that the over-size dimensions can be machined off to create an exact size for the part, but this wastes material. External means that only surfaces can be machined to get an accurate size for the part with no waste of material; this type of precision will be more expensive than with internal tolerance because it requires more steps in order to achieve accuracy.
The most common reason for internal tolerances on machines like lathes is that the machine would not start if the over-size part dimension was allowed. If a person such as an engineer or technician has to throw away material for every non-critical part, this will be very expensive. Internal and external tolerances should be kept as small as possible, but it cannot be avoided entirely. The limits that can be set depend on your equipment and the type of machining process used. CNC milling tolerance is only required when producing part drawings in CAD, which are generally accepted by the customer at the final stage before receiving a fully finished product.
The standard tolerance for CNC Milling is ±0.005″ per every .025 inches of finished diameter or 20% of diameter, whichever is greater (see ISO 286). For example, a part with a diameter of 9/16″ and 0.025″ tolerance has a total allowable deviation of ± 0.75″. A 5/8 inch diameter part with an allowance of 20% is limited to ± 0.44″, while a 7/8″ diameter part can be manufactured to within 0.05″.

FAQs related to CNC Machining, Milling and Turning Tolerance
What is tolerance?
Tolerance is the difference between a required dimension and an actual dimension. For example, if a part has a nominal size of 1 inch, the tolerance could be up to plus or minus .125″. This means that if the finished part is actually 1.000″, it will still meet specifications as long as it falls within .125″ of 1.000″.
What is the difference between Milling, Turning and Machining?
Milling is cutting metal away from a block material using a circular saw blade. This requires high precision and accuracy because of the force that’s needed to machine through such a hard material. On the other hand, turning is not as invasive because it requires bearing against only one side of the milling cutter, which cuts away particles from pieces to produce a desired size or shape. Turning accuracy is lower than with milling but yields similar results for prototypical purposes and low-volume production runs. Lastly, machining refers to any type of processing that removes materials by means of an abrasive agent on an appropriate work piece. This includes lathe processing like drilling holes or cutting on a milling machine. High-tech machining is used when producing parts that are very small or hard to handle.
What are the cost-benefits of CNC Machining Tolerance?
There is a large amount of tolerance that can be produced from machining processes. As much as 90% of production parts can be hand-machined, but this is time consuming and requires specialized tools for controlling and inspecting the process. With automated machinery, such as computer numerical control (CNC) machinery, making even the slightest prototype has become faster and more affordable; if required material waste must be discarded, it amounts only to .005″ per every .025″, which is significantly less than by hand. This can be very beneficial because there are many small parts that are difficult to handle with precision and cannot be produced manually.
Conclusion
Finally, CNC MachiningTolerance is a very useful tool for making small parts or prototypes that require high accuracy. This type of machining is much faster and more accurate than any other machine technology and can even be used to make almost any part that is smaller than an inch. Manufacturing parts in small quantities for prototypes or low-volume runs can be challenging with conventional tools, but with this new cutting-edge technology the task becomes easier.


