Gates are one of the most important components in an injection molding process. As the name implies, they basically facilitate the entry of molten plastic from sprues and runner channels into the mold cavity. The placement, type and application can affect the cycle time, surface finish and overall cost of an injection molding process. There are 7 key considerations for locating injection molding gates for connecting the runners and mold cavities. Let’s take a look at the common types of gates and the importance of proper placement to the injection molding process.
How Do Gates Work?
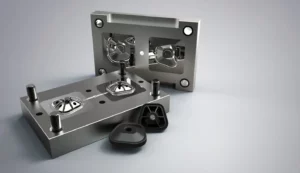
To understand the different placement for your gates, it is important to delve a little deeper into how gates work. Let’s begin from the injection molding process. First, hot pellets are crushed and forced into molten materials that begin to flow towards the mold cavity. The mold is designed to contain passage channels that lead the molten material into these cavities; these channels are called sprues and runners. As the molten material flows in these channels, the mold design will direct it towards a gate. The gate represents a narrow opening that allows the material into the mold, filing it up till the final shape is formed and cooled.

This now cooled molten material becomes solid within the mold cavity, but also solidifies at the gates of the mold. Once cooled, this solid protrusion at the gate must be trimmed in a process called degating. Degating may be automatic or manual.
Why are gate placements and design so important?
Material flow in injection molding operates on a pressure and volume relationship. Since the gate is the passageway into the mold cavity, factors like size, position and style all affect the cycle time, the tooling cost and material flow. The positioning of the gate in the mold cavity largely depends on the material and the part geometry. Gates can be narrow, tapered or wide.

Gate location determines the force, angle, and temperature at which the material enters the mold cavity. The size also affects material flow, pressure build-up and cosmetic finish. Gates that are too small will result in material build up and jetting. Wrong gate placements may also result in cosmetic flaws on the part during degating. Finally, to avoid defects like weld marks, gates must be adequately located near a thick wall, and at a decent distance from crucial mold parts like pins and cores. Where necessary, multiple gates can also be used to ensure smoother process cycles and mitigate the risk of part defects arising from material build up or improper flow.
Choosing the right gate design and location
1. Consider Strength
Before situating your gate, consider the area around the gate and the type of stress it is likely to face. During the injection process, the area around the gate will be subject to increase stress and pressure. It is therefore advised that gates are placed at sections with high thickness, as this will prevent defects like sink and voids and optimize part packing.
2. Cosmetic factors
Place some considerations around functionality and aesthetics, bearing in mind that the stress around the gates can affect the cosmetic appearance of your part.
3. Avoid puckering
When using plastic resins that have higher rates of shrinkage, it is advised that you locate your factor the risk of gate puckering that may arise from high mold-in stress around such areas.
4. Factor degating
Gate location can affect the ease of both automatic and manual degating processes after injection molding is complete. Factor degating into your DFM to reduce cycle times and help avoid unnecessary costs.
5. Consider multiple gates
Use a second gate to ensure proper filling of the mold cavity, minimize flow path length, and avoid part defects. When using multiple gates, it is very important to factor where the two flows meet, as this area can cause cosmetic defect or weaken the part due to stress build-up. Place gates at the heaviest cross section to enable proper part packing and lower chances of defects like sinks and voids.
6. Obstructions
Place your gate away from core, pins and other mold features that could impede the proper and consistent flow of molten material into the gates.
7. Wall thickness
Use uniform wall thickness around your gates to prevent flow problems. If your gate is situated around parts with thin walls, use a flow channel to balance the flow.


